ATF Level Check
Check
NOTE:
- Keep all foreign particles out of the transmission.
- Check the fluid level within 60-90 seconds after turning the engine off.
- Higher fluid level may be indicated if the radiator fan comes on twice or more.
1. Engine - Warm Up
- Start the engine. Hold the engine speed at 3,000 rpm without load (in P or N) until the radiator fan comes on, then let it idle.
2. ATF - Level Check
- Park the vehicle on the level ground.
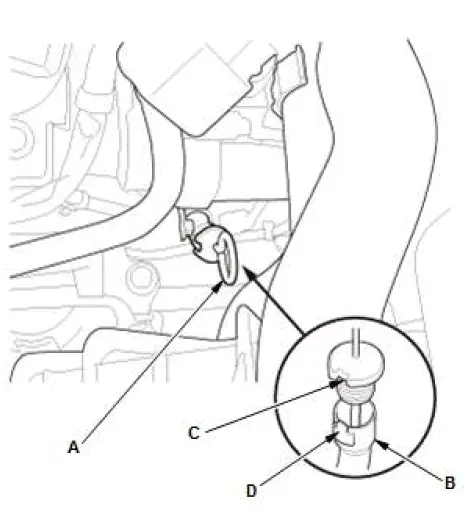
- Turn the engine off. Within 60-90 seconds, remove the ATF dipstick (A), then wipe it with a clean cloth.
- Insert the dipstick back into the ATF dipstick tube (B) aligning the notch (C) with the guide tab (D).
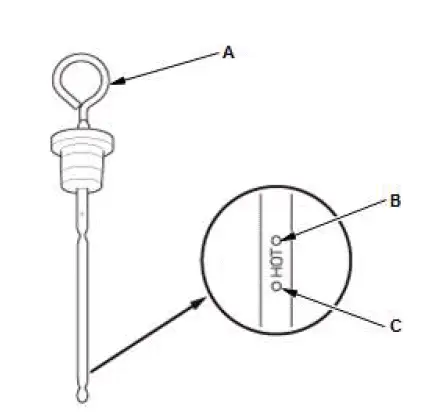
- Remove the ATF dipstick (A).
- Check the ATF level. It should be between the upper mark (B) and the lower mark (C).
- If the ATF level is below the lower mark, check for fluid leaks at the transmission, the hoses, and the line joints. If a problem is found, fix it before filling the transmission with ATF.
NOTE: If the vehicle is driven when the ATF level is below the lower mark, one or more of these symptoms may occur:
- Transmission damage.
- Vehicle does not move in any gear.
- Vehicle accelerates poorly, and engine revs up abnormally high when starting off in the forward and reverse positions.
- Engine vibrates at idle.
- If the ATF level is above the upper mark, drain the ATF to proper level.
NOTE: If the vehicle is driven when the ATF level is above the upper mark, the vehicle may creep forward while in N, or have shifting problems.
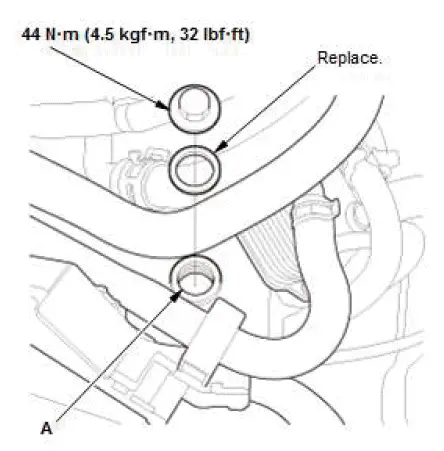
- If necessary, fill the transmission with the recommended fluid through the filler hole (A) to bring the fluid level between the upper mark and the lower mark of the ATF dipstick. Do not fill past the upper mark. Always use Honda ATF DW-1.
NOTE: Using a non-Honda ATF can affect shift quality.
- Insert the ATF dipstick back into the ATF dipstick tube.
ATF Level Check
Check
NOTE:
- Keep all foreign particles out of the transmission.
- Be careful not to burn yourself.
1. Vehicle - Lift Set
2. HDS DLC - Connect
3. ATF Level - Check
With AWD
- Turn the vehicle to the ON mode.
- Enter the VSA maintenance mode.
- Start the engine.
- Shift the transmission to S position/mode.
- Run the vehicle in 1st gear, 2nd gear, 3rd gear, and 4th gear, at sequential shift mode, and wait for at least 10 seconds to each gear. Slow down, and stop the wheels.
NOTE: Do not run transmission on the lift past 4th gear, or transmission damage will occur.
- Shift the transmission to P position/mode, then raise the engine speed at 2,000 rpm to ensure that the torque converter is full of ATF.
- Run the engine at idle speed until ATF Temperature reaches 104 ºF (40 ºC ) (allowed adjusting range: 99-113 ºF (37- 45 ºC) ) with the HDS.
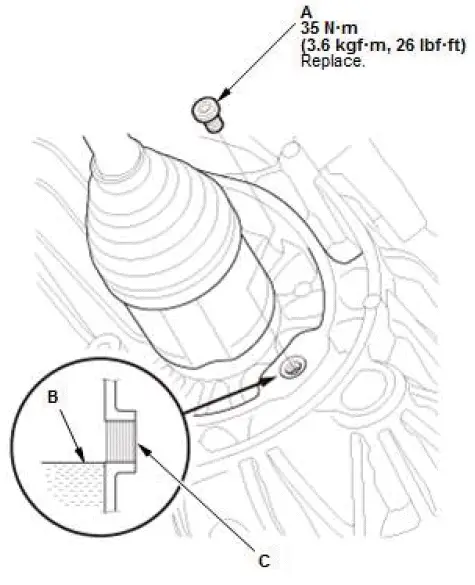
- Remove the level plug (A), and make sure the ATF level is at the proper level (B) while the engine is still running.
Proper ATF level: The ATF is dropping from the level plug hole with the transmission warmed up at 104 ºF (40 ºC).
NOTE: If the ATF level is below the proper level, check for fluid leaks at the transmission and the ATF lines. If a problem is found, fix it before filling the transmission with ATF.
Without AWD
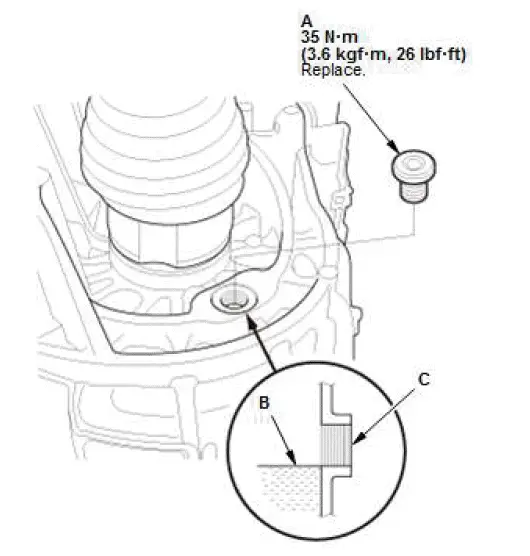
- If necessary, add the transmission with the recommended fluid through the level plug hole (C) until the ATF overflows, then wait until the ATF dropped. Always use Honda ATF TYPE 3.
NOTE: Using the wrong type ATF can affect shift quality.
- Install a new level plug.
- Turn the engine off.
4. All Removed Parts - Install
- Install the parts in the reverse order of removal.