ANC/Active Sound Control Microphone Removal and Installation
In this manual: ANC/Active Sound Control Microphone Removal and Installation
7steps
~42min
2/5difficulty
Done 0 of 7
Removal/Installation
SRS components are located in this area. Review the SRS component locations and the precautions and procedures before doing repairs or service.
NOTE: The front ANC/active sound control microphone, the front HFL-ANC/active sound control microphone, and the front HFL- navigation-ANC/active sound control microphone are the same parts.
Front (With Roof Console Module)
1. Roof Console Module - Remove
2. Front ANC/Active Sound Control Microphone - Remove

3. All Removed Parts - Install
- Install the parts in the reverse order of removal.
Front (With HomeLink)
1. Front ANC/Active Sound Control Microphone - Remove
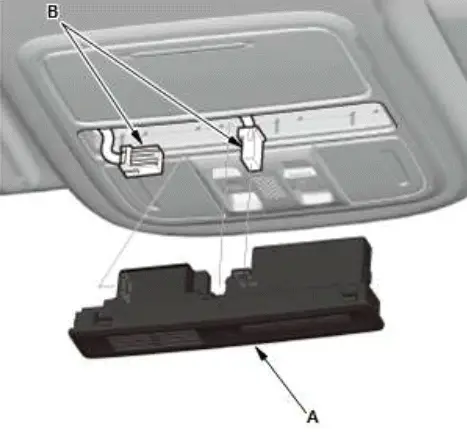
- Pull out the HomeLink module (A).
- Disconnect the connectors (B), then remove the HomeLink module.
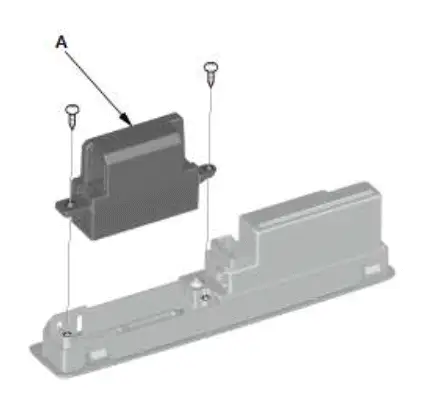
- Remove the front ANC/active sound control microphone (A).
2. All Removed Parts - Install
- Install the parts in the reverse order of removal.
Front (Without HomeLink)
1. Front ANC/Active Sound Control Microphone - Remove
- Pull out the front ANC/active sound control microphone (A).
- Disconnect the connector (B), then remove the front ANC/active sound control microphone.

2. All Removed Parts - Install
- Install the parts in the reverse order of removal.
Rear
1. Headliner - Remove
2. Rear ANC/Active Sound Control Microphone - Remove
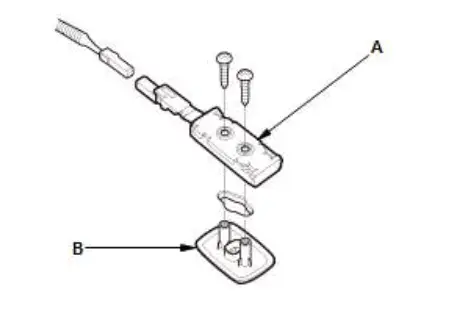
- Disconnect the connector.
- Remove the rear ANC/active sound control microphone (A) and cap (B).
3. All Removed Parts - Install
- Install the parts in the reverse order of removal.
Was this page helpful?