Over-Run Alternator Decoupler (OAD) Pulley Removal and Installation
In this manual: Over-Run Alternator Decoupler (OAD) Pulley Removal and Installation
6steps
~36min
2/5difficulty
Done 0 of 6
Removal/Installation
1. Alternator - Remove
2. OAD Pulley Seal Cap - Remove
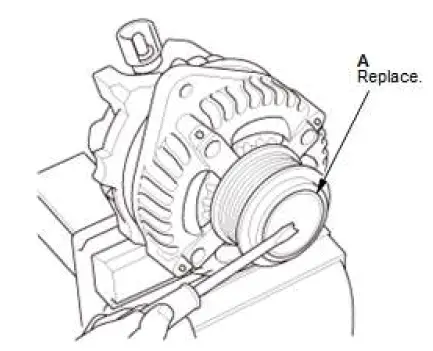
- Clamp the alternator firmly in a vise.
- Remove the OAD pulley seal cap (A) by piercing the center of the rubber cap with a flat screwdriver and prying it loose.
NOTE: While the cap is off, the grease inside the OAD pulley is exposed. Do not wipe the grease off, and make sure it does not become contaminated.
3. OAD Pulley - Remove
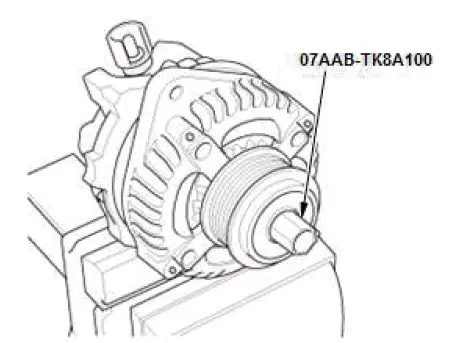
- Insert the alternator OAD pulley holder into the OAD pulley.
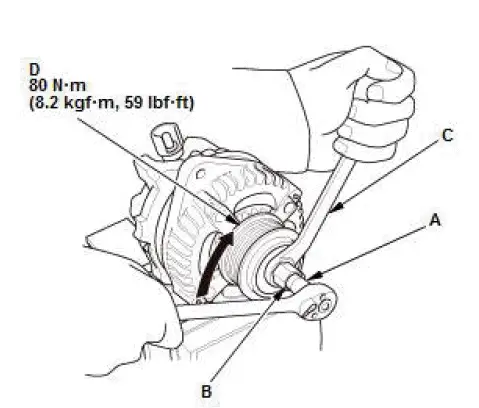
- Place a 10 mm deep socket wrench (A) through center of the alternator OAD pulley holder (B), onto hex on the end of the alternator shaft.
- Hold the alternator OAD pulley holder with a 17 mm wrench (C), then turn the alternator shaft clockwise.
- Remove the OAD pulley (D).
4. All Removed Parts - Install
- Install the parts in the reverse order of removal.
NOTE:
- When installing do not distort the OAD pulley seal cap.
- Make sure to check that the cap is installed securely.
Special Tool Required

- Alternator OAD Pulley Holder 07AAB-TK8A100
Was this page helpful?