Rear Control Arm Removal and Installation
In this manual: Rear Control Arm Removal and Installation
3steps
~18min
2/5difficulty
Done 0 of 3
Removal/Installation
1. Vehicle - Lift
2. Rear Wheel - Remove
3. Control Arm - Remove
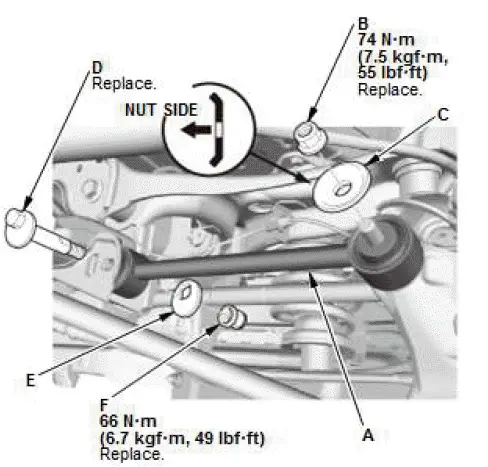
- Remove the control arm (A) mounting self-locking nut (B) and the washer (C).
NOTE: Use the new self-locking nut during reassembly.
- Mark the cam positions of the adjusting bolt (D) and the adjusting cam plate (E) with the frame.
- Remove the self-locking nut (F), the adjusting cam plate, and the adjusting bolt.
NOTE: Use the new adjusting bolt and the new self-locking nut during reassembly.
4. All Removed Parts - Install
- Install the control arm in the reverse order of removal, and note these items:
- Loosely install nuts and/or bolts to secure the bushings.
Load the suspension with the vehicle's weight and tighten the nuts and/or bolts to the specified torque.
- Align the cam positions of the adjusting bolt and the adjusting cam plate with the marked positions on the frame when tightening the self-locking nut.
- Before installing the wheel, clean the mating surfaces on the brake disc/drum and the inside of the wheel.
5. Wheel Alignment - Check
Rear Control Panel Removal and Installation
Removal/Installation
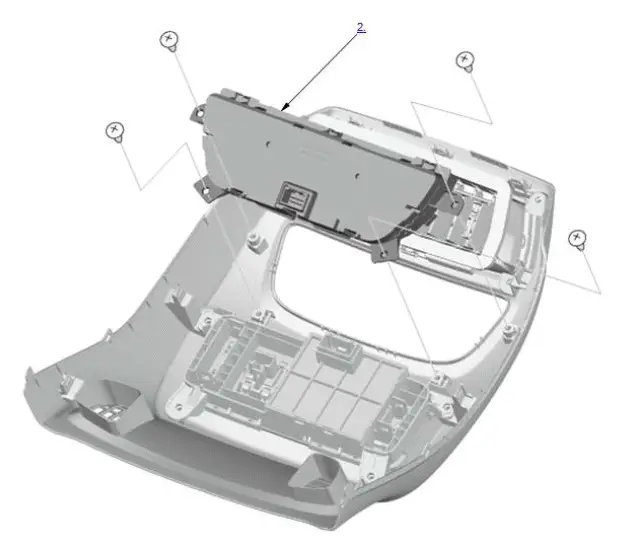
1. Center Console Rear Trim - Remove
2. Rear Control Panel - Remove
3. All Removed Parts - Install
- Install the parts in the reverse order of removal.
Was this page helpful?