Driver's Airbag Removal and Installation
In this manual: Driver's Airbag Removal and Installation
4steps
~24min
2/5difficulty
Done 0 of 4
Removal/Installation
SRS components are located in this area. Review the SRS component locations and the precautions and procedures before doing repairs or service.
NOTE: If replacing the driver's airbag after deployment, refer to Component Replacement/Inspection After Deployment for a complete list of other parts that must also be replaced.
1. 12 Volt Battery Terminal - Disconnect
NOTE: Wait at least 3 minutes before starting work.
2. Driver's Airbag - Remove
- Remove the bolts (A).
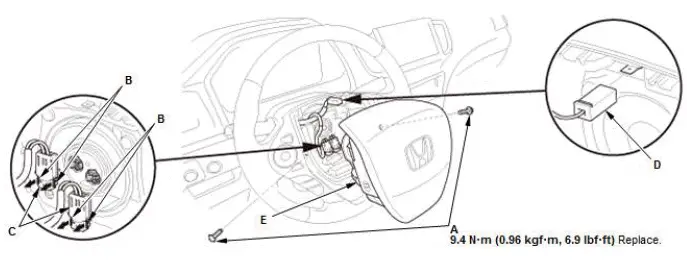
- Pull up on both locking tabs (B) to disconnect the connectors (C).
NOTE: Be careful not to damage the connectors.
- Disconnect the connector (D).
- Remove the driver's airbag (E).
3. All Removed Parts - Install
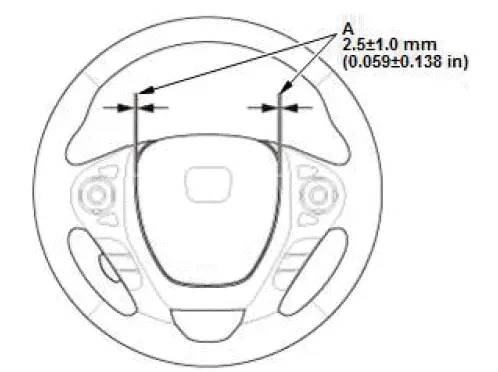
- Install the parts in the reverse order of removal.
NOTE:
- During installation, install the new bolts to the specified torque.
- Make sure the clearance (A) between the steering wheel and horn pad is the specified value.
- After connecting the negative cable to the 12 volt battery, make sure the horn works properly.
4. SRS Operation - Confirm
- Do the 12 volt battery terminal reconnection procedure, turn the vehicle to the ON mode, and check that the SRS indicator comes on for about 6 seconds and then goes off.
Was this page helpful?