Rear Door Rear Sash Outer Trim Removal and Installation
In this manual: Rear Door Rear Sash Outer Trim Removal and Installation
8steps
~48min
2/5difficulty
Done 0 of 8
Removal/Installation
1. Rear Door Quarter Glass - Remove
2. Rear Door Outer Molding - Remove
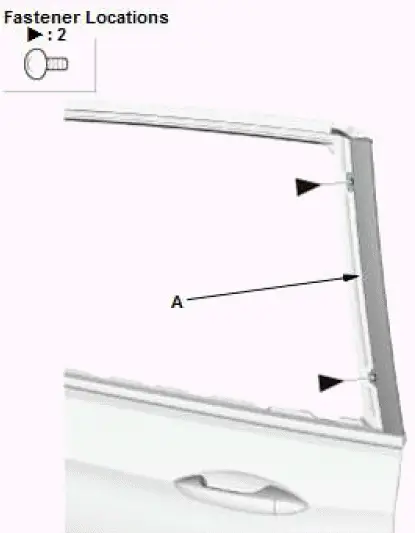
3. Rear Door Rear Sash Outer Trim - Remove
- Remove the rear door rear sash outer trim (A).
4. All Removed Parts - Install
- Install the parts in the reverse order of removal.
Rear Door Sash Outer Trim Removal and Installation
Removal/Installation
1. Rear Door Sash Outer Trim - Remove

- Lower the rear door glass.
- Pull away the rear door weatherstrip (A) and remove the clip.
- Remove the screw from the rear door outer molding (B).
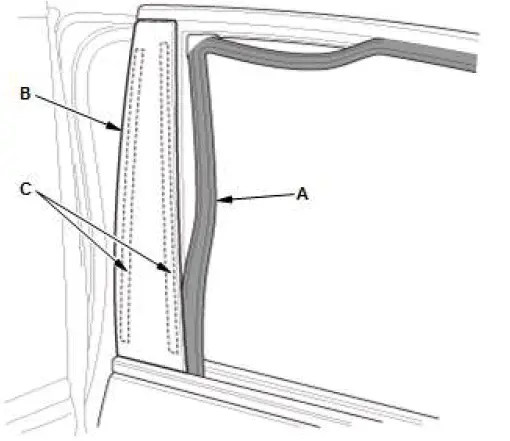
- Pull out the glass run channel (A) as needed.
- Pull out the upper edge of the rear door sash outer trim (B) from the edge of the sash, and cut the double-sided adhesive tapes (C) with a utility knife.

- Release the hook (A) of the rear door sash outer trim (B) from the rear door outer molding (C).
NOTE: Pull the rear door outer molding only as needed to release the hook (A). Excessive pulling will cause the molding to get damaged resulting in replacement.
- Release the hook (D) of the rear door sash outer trim from the sash (E), and then remove the rear door sash outer trim.
- Remove any remaining double-sided adhesive tapes from the rear door sash outer trim and the rear door sash, then clean the surfaces with a sponge dampened with isopropyl alcohol. After cleaning, keep oil, grease, and water from getting on the clean surface.
2. All Removed Parts - Install
- Install the parts in the reverse order of removal.
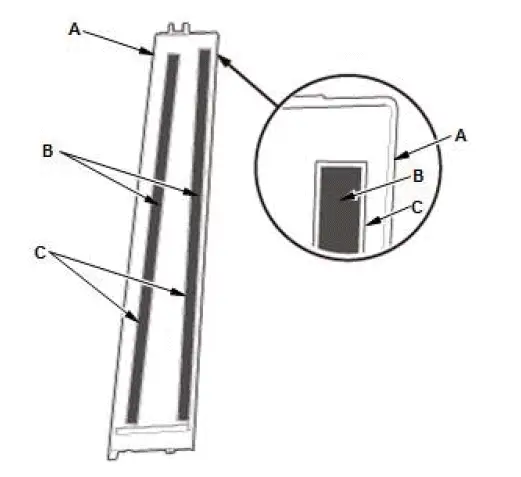
NOTE : If you are reusing the original rear door outer trim (A), apply adhesive primer to the areas where the new double-sided adhesive tapes (B) will be applied, and then attach the new double-sided adhesive tapes to the rear door outer trim on the scribes (C) as shown.
Adhesive tape
(B): Thickness 0.8 mm (0.031 in)
Width 10 mm (0.39 in)
Length 450 mm (17.72 in)
Was this page helpful?