Secondary Valve Body Removal and Installation
Removal
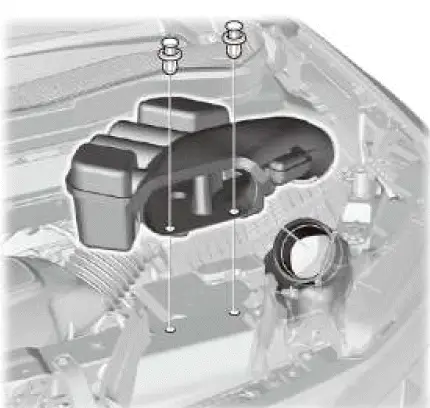
1. Front Bulkhead Cover - Remove
2. Air Intake Tube - Remove
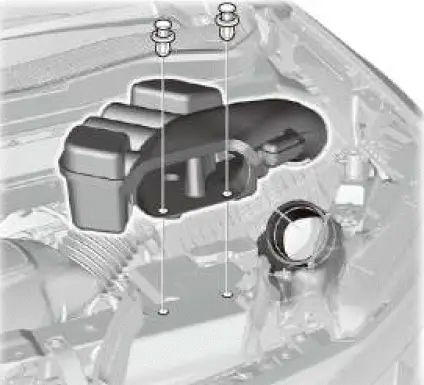
3. Air Cleaner - Remove
4. 12 Volt Battery - Remove
5. 12 Volt Battery Box - Remove
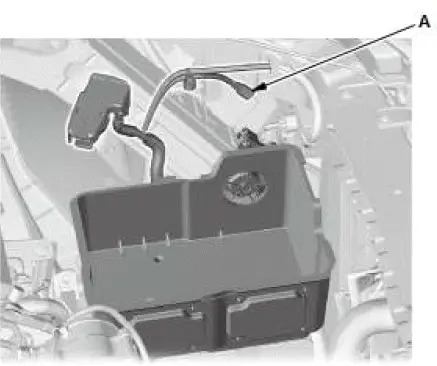
- Disconnect the connector (A).
6. 12 Volt Battery Duct - Remove
7. 12 Volt Battery Base - Remove
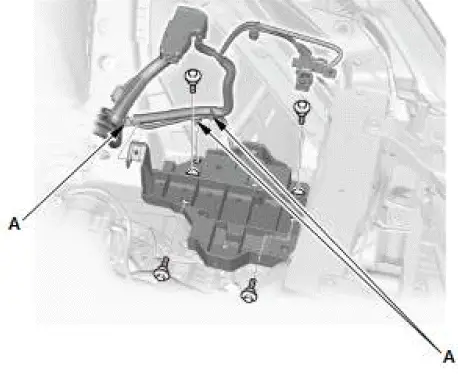
- Remove the harness clamps (A).
8. Starter - Remove
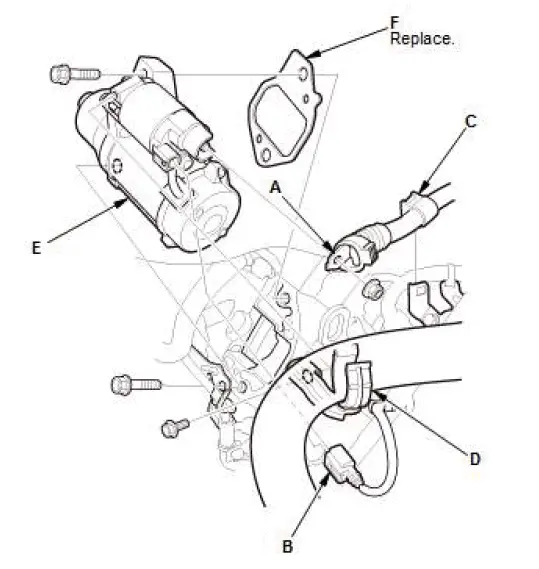
- Disconnect the positive starter cable (A) and the S terminal connector (B).
- Remove the harness clamp (C).
- Remove the water hose clamp (D).
- Remove the starter (E) with the gasket (F).
9. Engine Wire Harness (Transmission Side) - Remove

- Disconnect the connector (A).
- Remove the harness clamp (B).

- Disconnect the connectors (A).
- Remove the harness cover (B).
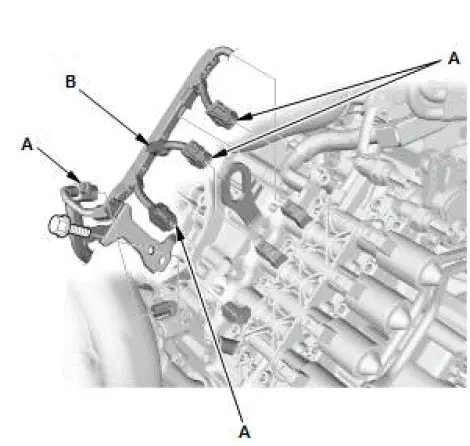
- Disconnect the connectors (A).
- Remove the harness cover (B).
10.Secondary Valve Body - Remove

- Remove the secondary valve body (D).
NOTE: Do not disassemble the secondary valve body. If any problem occurs, replace the assembly.
- Remove ATF pipes A, B, and C, with the O-rings (E) and the gasket (F).
NOTE: Do not drop the ATF pipes into the transmission. If an ATF pipe is dropped into the transmission, the transmission will need to be disassembled to recover the pipe(s).
Installation
1. Secondary Valve Body - Install

- Clean the mounting surfaces of the transmission housing.
NOTE: Do not allow dust or other foreign particles to enter the transmission.
- Apply ATF to new O-rings (D), then install the O-rings over ATF pipes A, B, and C.
- Install the ATF pipes with the filter ends (E) facing the secondary valve body (F) into the transmission.
NOTE: Do not drop the ATF pipes into the transmission. If an ATF pipe is dropped into the transmission, the transmission will need to be disassembled to recover the pipe(s).
- Install the secondary valve body using a new gasket (G) while aligning the ATF pipes with the pipe holes on the secondary valve body.
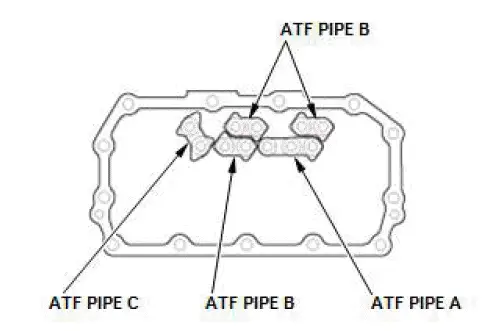
2. Engine Wire Harness (Transmission Upper Side) - Install
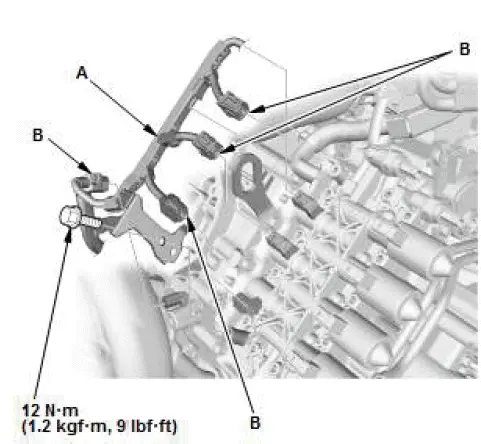
- Install the harness cover (A).
- Connect the connectors (B).
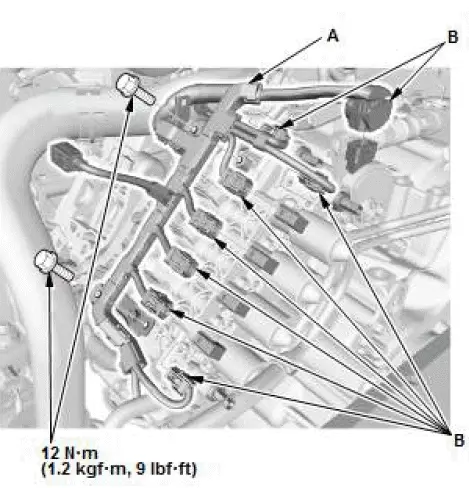
- Install the harness cover (A).
- Connect the connectors (B).
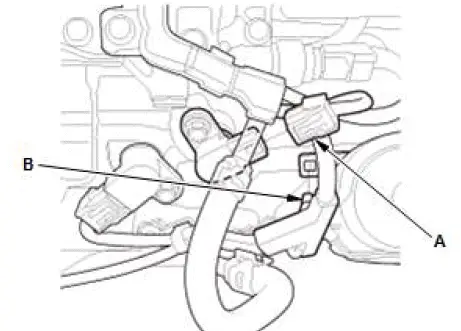
- Connect the connector (A).
- Install the harness clamp (B).
3. Starter - Install
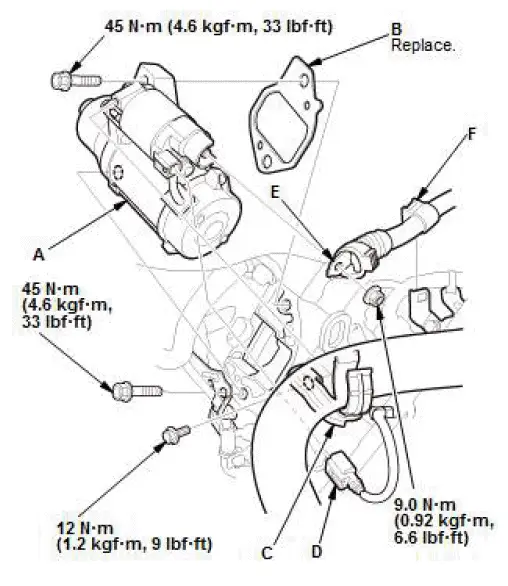
- Install the starter (A) using a new gasket (B).
- Install the water hose clamp (C).
- Connect the S terminal connector (D) and the positive starter cable (E).
NOTE: Make sure the crimped side of the ring terminal faces away from the starter when you connect it.
- Install the harness clamp (F).
4. 12 Volt Battery Base - Install

- Install the battery base and the harness clamps (A).
5. 12 Volt Battery Duct - Install
6. 12 Volt Battery Box - Install
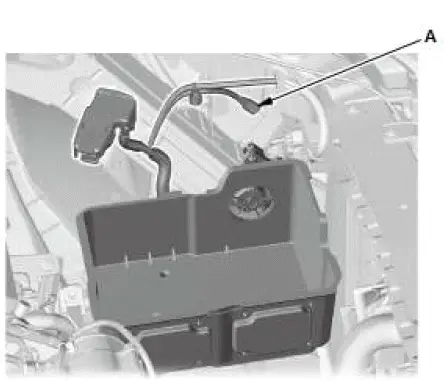
- Connect the connector (A).
7. 12 Volt Battery - Install
8. Air Cleaner - Install
9. Air Intake Tube - Install