Camshaft Removal and Installation
Removal
Front
1. Engine Coolant - Drain
2. 12 Volt Battery - Remove
3. 12 Volt Battery Box - Remove
4. Water Passage - Remove
5. Timing Belt - Remove
6. Front Camshaft Pulley and Back Cover - Remove
7. Front Rocker Arm Assembly - Remove
8. Front Camshaft - Remove
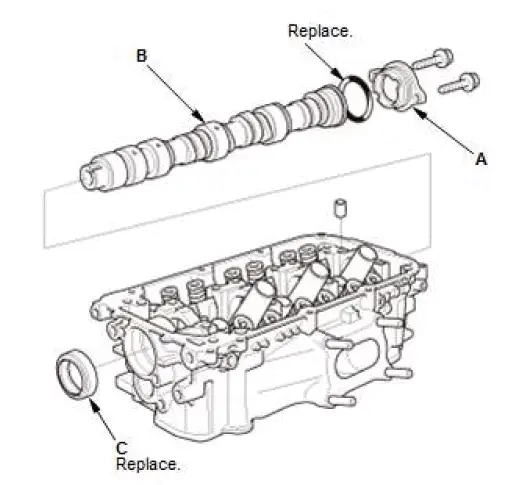
- Remove the thrust cover (A).
- Remove the front camshaft (B).
- Remove the camshaft oil seal (C).
Rear
1. Fuel Pressure - Relieve
2. Engine Coolant - Drain
3. Air Cleaner - Remove
4. Intake Manifold and Intake Manifold Base - Remove
5. High Pressure Fuel Pump - Remove
6. Heater Hose - Disconnect
6-Speed A/T
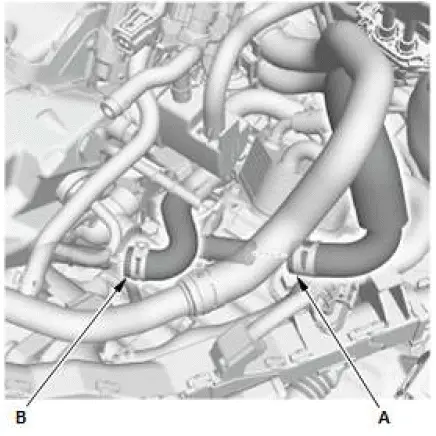
- Disconnect the heater hoses (A).
- 6-Speed A/T: Disconnect the water bypass hose (B).
9-Speed A/T
7. EVAP Canister Purge Joint Bracket - Remove

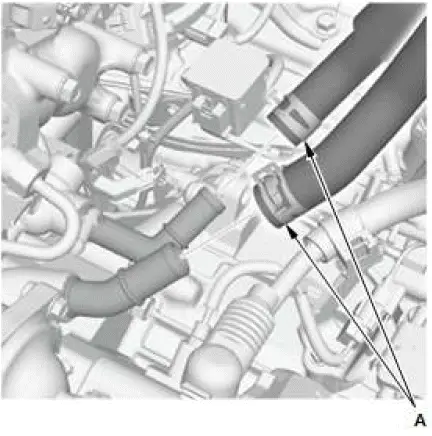
- Move the EVAP canister purge joint (A).
- Remove the EVAP canister purge joint bracket (B).
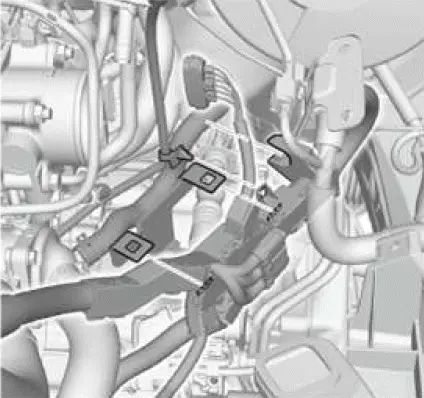
8. Harness Holder - Move (6-Speed A/T)
9. Timing Belt - Remove
10.Rear Camshaft Pulley and Back Cover - Remove
11.Rear Rocker Arm Assembly - Remove
12.Rear Camshaft - Remove

- Remove the high pressure fuel pump housing (A).
- Remove the rear camshaft (B).
- Remove the camshaft oil seal (C).
Installation
Front
1. Front Camshaft - Install
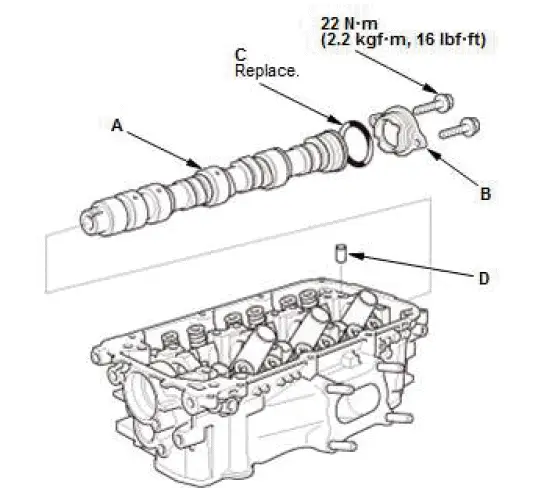
- Apply new engine oil to the journals and the cam lobes.
- Insert the camshaft (A) into the cylinder head, then install the camshaft thrust cover (B).
NOTE: Always use a new O-ring (C).
- Install the dowel pin (D).
2. Front Rocker Arm Assembly - Install
3. Front Camshaft Oil Seal - Install
4. Front Camshaft Pulley and Back Cover - Install
NOTE: Apply new engine oil to the threads of the camshaft pulley mounting bolt.
5. Timing Belt - Install
6. Valve Clearance - Adjust
7. Front Cylinder head Cover - Install
8. Water Passage - Install
9. 12 Volt Battery Box - Install
10.12 Volt Battery - Install
11.Engine Coolant - Refill/Air Bleed
12.Idle Speed - Inspect
13.CKP Pattern - Clear/Learn
Rear
1. Rear Camshaft - Install
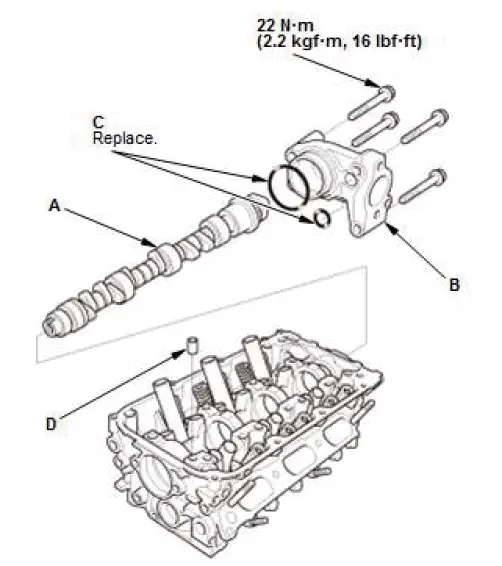
- Apply new engine oil to the journals and the cam lobes.
- Insert the camshaft (A) into the cylinder head, then install the high pressure fuel pump housing (B).
NOTE: Always use new O-rings (C).
- Install the dowel pin (D).
2. Rear Rocker Arm Assembly - Install
3. Rear Camshaft Oil Seal - Install
4. Rear Camshaft Pulley and Back Cover - Install
NOTE: Apply new engine oil to the threads of the camshaft pulley mounting bolt.
5. Timing Belt - Install
6. Valve Clearance - Adjust
7. Rear Cylinder head Cover - Install
8. Harness Holder - Install (6-Speed A/T)
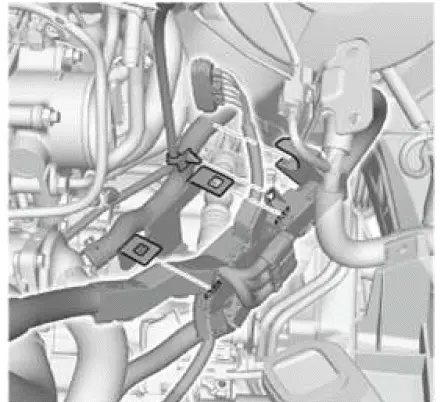
9. EVAP Canister Purge Joint Bracket - Install

- Install the EVAP canister purge joint bracket (A) and the EVAP canister purge joint (B).
10.Heater Hose - Connect
6-Speed A/T

- Connect the heater hoses (A).
- 6-Speed A/T: Connect the water bypass hose (B).
9-Speed A/T
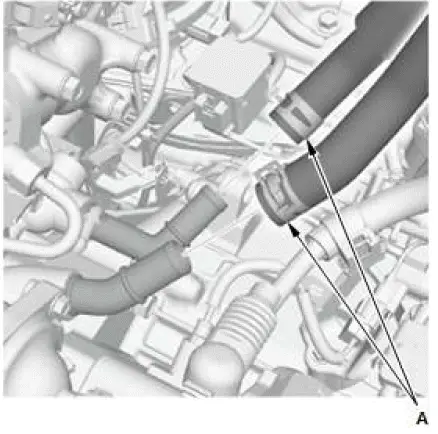
11.High Pressure Fuel Pump - Install
12.Engine Coolant - Refill/Air Bleed
13.Fuel Leak - Check
14.Intake Manifold Base and Intake Manifold - Install
15.Air Cleaner - Install
16.Idle Speed - Inspect
17.CKP Pattern - Clear/Learn