Cruise Control Combination Switch Removal, Installation, and Test
In this manual: Cruise Control Combination Switch Removal, Installation, and Test
5steps
~30min
2/5difficulty
Done 0 of 5
Removal/ Installation
SRS components are located in this area. Review the SRS component locations and the precautions and procedures before doing repairs or service.
1. Steering Wheel Trim - Remove
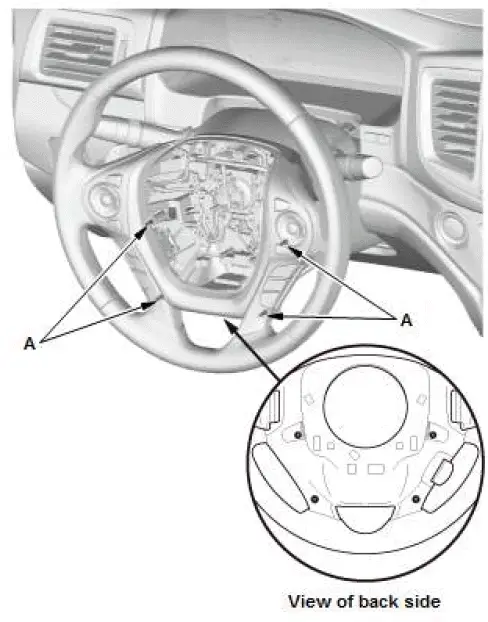
- Adjust the steering column to the full telescopic out position.
- Loosen the screws (A).
NOTE:
- Turn the steering wheel to the proper position to loosen the screws.
- The screws remains in the rear cover.
- Remove the driver's airbag.

- Pull out the steering wheel trim (A), then disconnect the connectors (B).
- Remove the steering wheel trim.
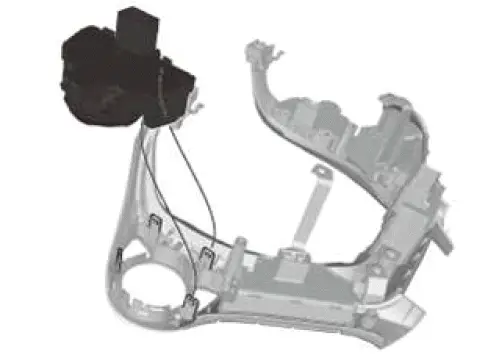
2. Cruise Control Combination Switch - Remove
3. All Removed Parts - Install
- Install the parts in the reverse order of removal.
Test
1. Cruise Control Combination Switch - Test
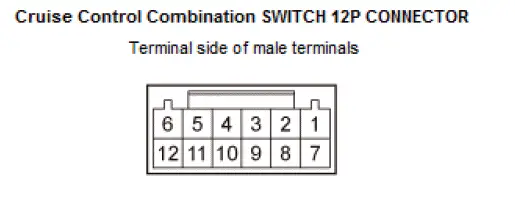
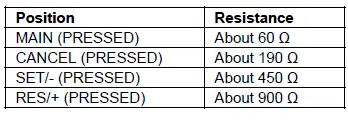
Cruise Control Combination Switch Internal Resistance Check:
- Measure the resistance between cruise control combination switch 12P connector terminals No. 2 and No. 5 according to the table.
If there is no resistance in one or more positions, replace the cruise control combination switch.
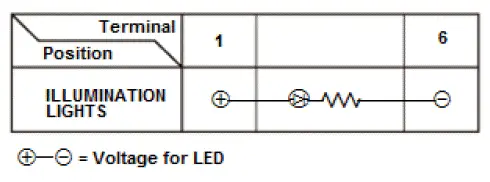
Cruise Control Combination Switch Illumination Circuit Check:
- Check the LED for illumination by applying power and ground to the terminals according to the table.
NOTE: Important operating characteristic; diode bias cause a diode to fully conduct electricity in one direction (forward), while not at all in the opposite direction (reverse).
If the results are not as specified, replace the RDM OFF switch.
Was this page helpful?