EPS Motor/Control Unit Removal and Installation
In this manual: EPS Motor/Control Unit Removal and Installation
19steps
~114min
4/5difficulty
Done 0 of 19
Removal
1. 12 Volt Battery Terminal - Disconnect
2. Driver's Dashboard Lower Cover - Remove
3. EPS Motor/Control Unit - Remove
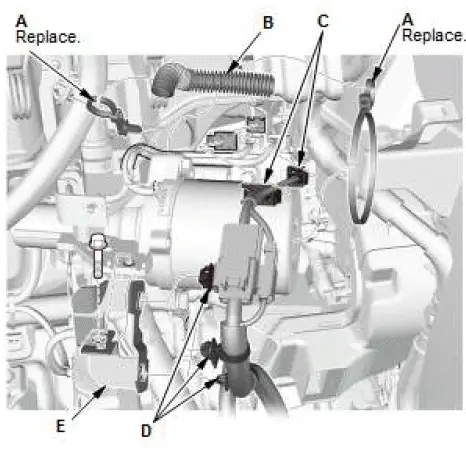
- Remove the cable ties (A).
NOTE: Cut the cable tie to remove.
- Remove the tube (B).
- Disconnect the connectors (C).
- Remove the harness clips (D).
- Remove the harness bracket (E).
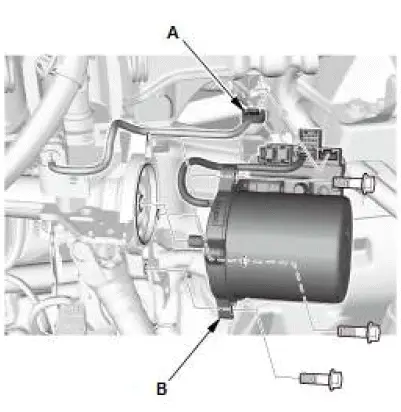
- Disconnect the connector (A).
- Remove the EPS motor/control unit (B).
Installation
1. EPS Motor/Control Unit - Install
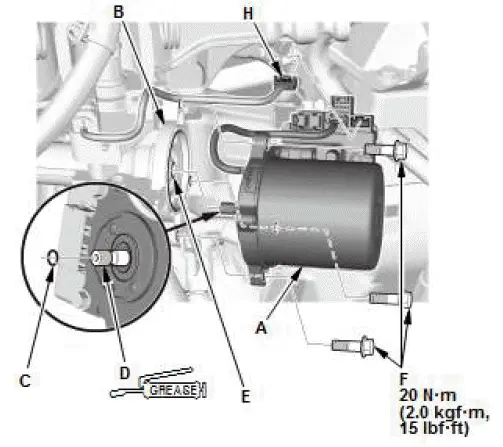
- Clean the mating surfaces between the EPS motor/control unit (A) and the steering column (B).
NOTE: Make sure to keep sny dust and debris away front the EPS motor/control unit components.
- Install a new O-ring (C) to the EPS motor.
- Apply grease to the EPS motor shaft (D).
- Install the EPS motor/control unit on the steering column by engaging the EPS motor shaft and the worm shaft (E).
- Loosely install the bolts (F) by hand but do not tighten.
NOTE:
- Before tightening the bolts, turn the motor two or three times to the right and left about 45 degrees.
- Make sure the EPS motor is evenly seated on the steering column.
- Tighten the EPS motor mounting bolts to the specified torque.
- Connect the connector (G).
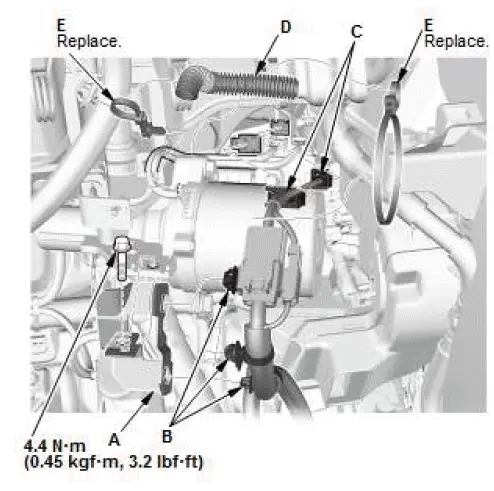
- Install the harness bracket (A).
- Install the harness clips (B).
- Connect the connectors (C).
- Install the tube (D).
- Install new cable ties (E).
2. Driver's Dashboard Lower Cover - Install
Was this page helpful?