Carpet Removal and Installation
Removal/Installation
NOTE: SRS components are located in this area. Review the SRS component locations and the precautions and procedures before doing repairs or service.
Front Floor Carpet
1. Both Front Seats - Remove
2. Rear Door Sill Lower Trim - Remove
3. Both Second Row Seats - Remove
4. Third Row Seat Cushion - Remove
5. Both Kick Panels - Remove
6. Both B-Pillar Lower Trims -Remove
7. AC Inverter Unit - Remove (For Some Models)
8. Media Hub Unit - Remove (for Some Models)
9. Center Console - Remove
10.Shift Lever - Remove (6-Speed A/T)
11.2nd Row Center Console - Remove (For Some Models)
12.Select Lever Bracket - Remove
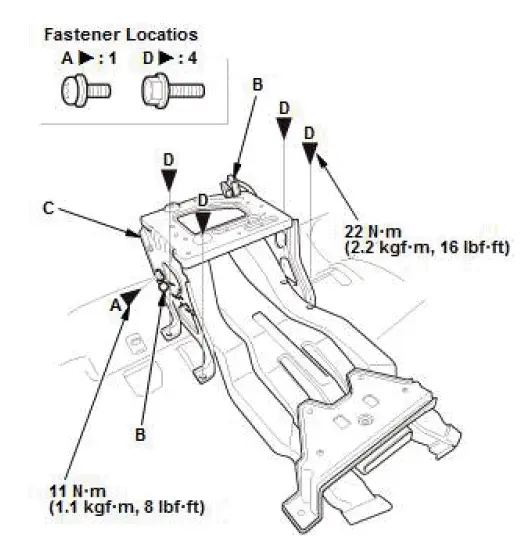
- Remove the ground bolt (A) with a TORX T30 bit.
- Remove the harness clips (B).
- Remove the select lever bracket (C).
13.Rear Console Heater Duct - Remove

- Remove the rear console heater duct (A).
14.Front Floor Carpet - Remove
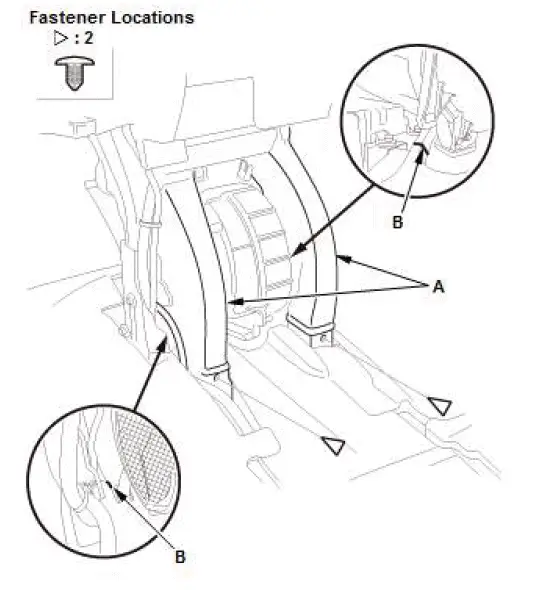
- Remove the rear heater ducts (A).
- Cut the carpet in the areas (B) as shown.
NOTE : When installing the new carpet, cut the carpet in the areas as shown.

- To remove the upper clips (A), use a flathead screwdriver to push in the two tabs (B) in the lower clips (C). Once the tabs are pressed in, remove the upper clips.
NOTE: The lower clips will stay in the body. If necessary, remove the lower clips.
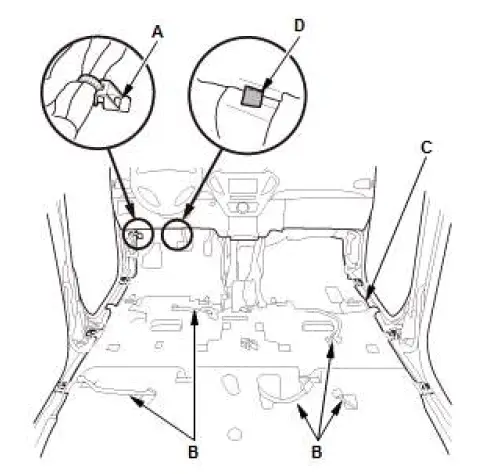
- Remove the harness clip (A).
- Pull out the seat harnesses (B) through the hole in the front floor carpet (C).
- Release the fastener (D), and remove the front floor carpet.
15.Floor Mat Holder - Remove
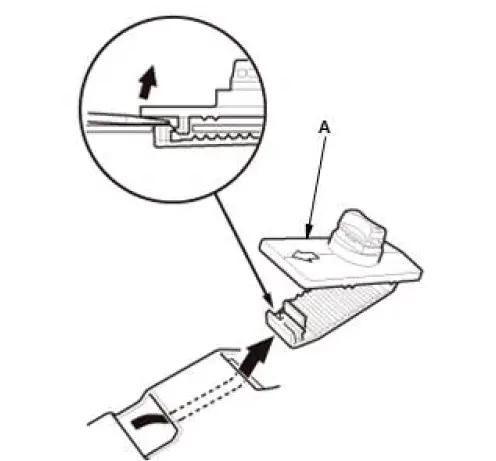
- If necessary, remove the floor mat holder (A).
16.All Removed Parts - Install
- Install the parts in the reverse order of removal.
Cargo Floor Carpet
1. Third Row Seat - Remove
2. Rear Side Trim Panel - Remove
3. Cargo Floor Carpet - Remove

- To remove the upper clips (A), use a flathead screwdriver to push in the two tabs (B) in the lower clips (C). Once the tabs are pressed in, remove the upper clips.
NOTE: The lower clips will stay in the body. If necessary, remove the lower clips.
- Remove the cargo floor carpet (D).
4. All Removed Parts - Install
- Install the parts in the reverse order of removal.